Update: 01/20/21: We’ve updated this guide with information about the new PC-based website casting option from Oculus, more capture card options we’ve tested, and a different/new HDMI splitter recommendation for Chromecast streaming. We also re-ordered the structure of the article.
Update: 10/15/20: We’ve updated this guide with references to the Oculus Quest 2 and amended the sections that mention ScrCpy to reflect that it’s now included as a feature in SideQuest.
Update 05/19/19: We’ve updated this guide with a third option at the bottom that does not require Chromecast and still provides a wireless solution. There are some drawbacks, but it’s a good overall solution. We’ve also updated the text to reflect a third option.
[When you purchase items through links on our site, we may earn an affiliate commission from those sales.]
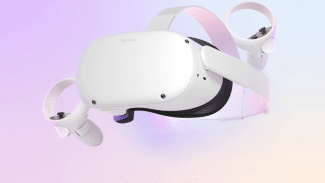
Main Article: The Oculus Quest is an impressive standalone VR headset that lets you wirelessly enter games from anywhere with full 6DOF positional tracking. And now, the platform is better than ever with the release of the Oculus Quest 2. One of the only drawbacks to a wireless device is that there is no screen to show what you’re doing such as with a PC monitor or a PSVR connected to a TV.
Thankfully Oculus included some options, but it isn’t quite as flexible as we would have liked. By default there are three main ways to stream Oculus Quest footage: to your phone via the Oculus app, to a Chromecast 3 and/or Chromecast Ultra device, or to your personal Facebook page.
The problem here is that your personal Facebook page doesn’t include brand pages (like a company page) and that also means there’s no way to get the footage to a PC for customizing in OBS, adding webcam output, streaming to platforms other than Facebook, including chat and/or mic options, etc.
Don’t worry — we’ve got you covered. Basically there are three other options for better Quest or Quest 2 livestreaming: you can plug the Quest into your PC, which limits mobility but is cost-effective and easy to do, you can buy everything you need to go fully wireless with Chromecast, or you can go the middle route and go wirelessly in a cost effective way with some other drawbacks. We’ll cover all three ways.
So, here’s everything you need to stream Oculus Quest to Twitch, YouTube, Facebook, and any other streaming platform of your choice.
Wireless Casting Quest / Quest 2 Streaming: What You Need
The best way to stream Oculus Quest to your PC right now that allows you to then broadcast to your audience on platforms like Twitch, YouTube, and Facebook, is to use the casting method. It allows you to play and stream, in real-time, 100% wirelessly. You’ll do this by leveraging Quest and Quest 2’s ability to cast to Chromecast.
Using a Chromecast
First, you’ll need a supported Chromecast device. Reportedly the Chromecast 3 and all Chromecast 3 devices will work, but the only one that I have successfully tested is the Chromecast Ultra. Buy one if you haven’t already.
Then, this is where it gets a little tricky. Chromecast cannot be plugged into a PC directly because it is an HDMI input device so it needs a screen to output footage. And since it is primarily used for content-protected footage like Netflix, HBO, Hulu, and others, you’ll need a way around that. So you’ll need to buy an HDCP Stripper / HDMI Splitter to get around those limitations. This one from Portta is the one I currently use and have tested successfully. It’s got two output ports as well so you can output to a TV in addition to your capture card if you’d like.
Then you need to use a capture card to get the footage off of the Chromecast and onto your PC screen, similar to what you’d need to record high-quality footage of PSVR or any HDMI-output device. In the past I’ve used the El Gato HD60 S and it was great for a while, but I eventually switched to the El Gato HD60 S+ which is nearly identical, but the capture software is much better and more stable. It also included 4K passthrough so even if I am streaming in 1080p my output on my TV screen can still be 4K for things like PS5 and other consoles.
If getting a high-end El Gato is a bit too expensive for you right now, we can also recommend a cheaper alternative instead. The $20 IdealForce capture card will capture 1080p footage and all you do is plug the HDMI output into the “input” slot and then plug the USB stick into a USB 3.0 port on your PC. It will show up as a “Video Capture Device” in OBS, including audio.
Using The Oculus Casting Website
After Quest 2 launched Facebook released a new casting method that completely sidesteps the need for a Chromecast device. Instead, all you have to do is visit the Oculus casting portal and login on your associated Oculus/Facebook account.
Once you do that, when you click the “Share” and “Cast” options in your headset, you should see “Computer” listed as one of the options. Click that and you’re now casting to your PC, including audio.
In my experience the clarity is great and there is even less latency between your real-world movements and the footage itself. It works well — however, it only casts one eye. This means the output is a vertical rectangle with black boxes on the sides, it’s not a full-screen 16:9 aspect ratio output feed like using a Chromecast so you’ll have a lot of empty space on your stream. Maybe you want to fill that with banners, sponsors, reminders for viewers, your chat box, etc and it’ll be fine.
Personally, I prefer to let the game footage take up as much screen space as possible so I never use this method. I stick to using a Chromecast, splitter, and capture card.
Another alternative: I have not tried this yet, but VRManic in the comments recommends using a program called AirServer that seems to emulate casting for your PC. There is a 30-day free trial, but after that you need to pay for a license to use it.
Audio and Webcam
Now if you’re like me and you like to have friends, colleagues, etc in Discord while you’re streaming to talk to and read off/respond to comments when you’re in VR, then you need one extra step. You’ll need to get the audio from your PC wirelessly so you can hear them. You also need a high-quality and reliable wireless microphone to speak with viewers and go fully untethered. That’s why I recommend the Lucid Sound LS31 headset, but any wireless headset with a decent microphone should work fine. If you aren’t going to talk to anyone on Discord or something then you can forego the fancy headset and just plug headphones into the Quest. However, you still need to get your voice to the PC for OBS so you’ll need a different wireless microphone solution. I have not tested it, but a wireless lav system would probably work fine.
And if you want to stream your physical body as well, then you need a good webcam too with a tripod or some other kind of mount.
Wireless Chromecast Quest / Quest 2 Streaming: How To Do It
Here is what your stream can look like: [YouTube Archive]
Make Sure Your Quest Is Ready
In order to do this streaming method, the setup process is a lot different than the first method. For starters, you need to make sure your Quest is not in developer mode. You should also verify that your Chromecast device is setup and functioning properly (test it with a YouTube video from your phone or something) before moving ahead.
Make sure all three devices (phone, Chromecast, and Quest) are setup on the same WiFi network — I recommend 5GHz instead of just 2.4GHz if possible. It’s also best to just reboot the Quest, your phone, and the Chromecast as well before getting started.
Plug Everything In
This is where this setup gets a little confusing. Basically you need to plug your Chromecast Ultra (or Gen 3 or whatever you’re gonna use) into the HDCP Stripper “In” side, then plug the “Out” of the Stripper into your capture card “In” side, then plug that into your PC. In the case of the El Gato HD60 S, that’s a USB cord.
So in my case I’ve got the Stripper and my my capture card plugged into the wall for power too. It’s kind of a lot of cords, but it is what it is.
Cast The Quest
In the Oculus app tap the cast icon in the top right corner, select the name of your Chromecast device in the list of options, and select video quality. Normal always works great for me. Then click Cast.
Since I use the El Gato HD60 S, I have an app on my PC called “Game Capture HD” which is the window that the footage appears inside from the Chromecast input.
Remember: if it gives you errors, double check all the WiFi networks and restart all three devices and maybe even put the Quest in developer mode then switch it back off again. Doing all of that has worked for me every time to resolve any issues.
If you’re using the website casting portal then just crop the web browser window as a “Window Capture” source in OBS.
Sync Video and Audio
If you’re using a webcam then you might notice the Chromecast footage is slightly delayed versus the actual footage you see inside your headset. That’s normal. The issue is that your webcam footage is going to be a little bit ahead of what the viewer sees happening in the game. Fixing this is very simple.
In OBS right click on the webcam Video Capture Device source and click Filters. Click the plus icon and in the drop down list select “Render Delay.” When I set mine up I found it to be right around 160 milliseconds, but it may have been updated and improved since then. Just play around with some values until your webcam footage and Chromecast footage appear to be aligned.
Setup Audio (Optional)
If you’re just planning on streaming through OBS and not using your microphone or responding to comments at all then you don’t really need to worry about this step. But if you want to be able to talk to your viewers you’ll need to take things a tiny bit further. This is where a wireless microphone comes into play.
There might be a way to get the input of your Quest microphone to your PC, but I don’t know how to do that. Instead, I wear a wireless headset (the Lucid Sound one I linked earlier) that has a mic attached. It links up to my PC via a USB dongle.
Arrange Everything In OBS
Like I said earlier, I’m not going to cover OBS settings in detail here because I did that already in this guide. Basically you just want to arrange your OBS window. For me, I make the Game Capture HD window with my Chromecast footage full-screen and stick my webcam in the bottom left corner (shown above).
Just make sure you have all of the audio sources arranged correctly so that the Quest audio and your microphone are both funneling through OBS. And if you are talking to anyone on Discord while playing or if they’re reading chat (like I usually) then make sure chat audio is going into OBS as well.

Wireless Non-Chromecast Quest / Quest 2 Streaming: What You Need
The first thing you really need to do this correctly is a USB-C cord to connect the headset to your PC for the setup. You need to plug it in to initialize the wireless connection each time.
Then you need to go download a program called Vysor. There is a free trial version with limitations but I just paid $40 for the unlocked lifetime subscription. Vysor is a program that uses a form of wireless adb. You can accomplish a similar effect manually with command line prompts and scrcpy but I prefer simplicity.
Alternatively, instead of Vysor you can use the built-in ScrCpy function within SideQuest with its wireless option.
The biggest downside to these methods is that they do not send the audio signal at all as far as we’ve seen, just video. My way around that is a wireless mic that sits around my neck and points at the external speaker on my Quest to pick up the game audio. If I speak loudly and clearly, it picks up my voice as well too. This is the one I got. I have not tested it, but a wireless lav system would probably work fine too.
Now if you’re like me and you like to have friends, colleagues, etc in Discord while you’re streaming to talk to and read off/respond to comments when you’re in VR, then you need one extra step. You’ll need to get the audio from your PC wirelessly so you can hear them. That’s why I recommend the Lucid Sound LS31 headset, but any wireless headset should work fine. If you aren’t going to talk to anyone on Discord or something then you can forego the fancy headset. However, you still need to get your voice to the PC for OBS so you’ll need a different wireless microphone solution like the one I linked earlier.
Other than that you need a webcam (so people can see what you’re doing IRL and not just your point of view in the headset) and Streamlabs OBS. For OBS setup and configuration refer to my previous VR livestreaming guide — I’m not going to rehash all of that here. The same setup process applies.

Wireless Non-Chromecast Quest / Quest 2 Streaming: How To Do It
Here is what your stream can look like: [YouTube Archive]
Put Your Quest In Developer Mode
First and foremost, you need to put your Quest in Developer mode for this method to work. You can do this by making sure it’s powered on and paired to the mobile app, then go to Settings, click on the Quest, go to Advanced Setting, and toggle on Developer Mode. That’s it. You may need to register your Oculus account as a Developer account if you don’t see the option.
Plug It In
Now you need to plug it in to the computer. That means plug the USB-C cord into your Quest (in the same port you use to charge it) and plug the other end into your PC. You need to do this at the beginning of your setup process every time you want to stream the Quest wirelessly.
Activate/Setup Vysor
Open up Vysor and it should automatically detect your Quest as an Android device. Now click View. From here you can tweak settings like the resolution, bitrate, and more. I try to keep everything as high as possible. The output window will be two side-by-side fisheye lenses — one of each eye. I crop out the left eye in OBS so viewers only see one eye. Now you need to click the wireless button in Vysor, wait for it to reboot the signal, then unplug the Quest. It’ll reboot the signal one more time then you’re good to go!
Or if instead of Vysor you’re using the built-in ScrCpy function within SideQuest, it also now supports an ‘experimental’ wireless connection mode too. If you go the SideQuest route with ScrCpy wirelessly make sure you connect your Quest wired first, launch SideQuest, enable wireless connection, and then enable the screen share.
Sync Video and Audio
If you’re using a webcam then you might notice the Vysor footage is slightly delayed versus the actual footage you see inside your headset. That’s normal. The issue is that your webcam footage is going to be a little bit ahead of what the viewer sees happening in the game. Fixing this is very simple.
In OBS right click on the webcam Video Capture Device source and click Filters. Click the plus icon and in the drop down list select “Render Delay.” When I set mine up I found it to be right around 160 milliseconds, but it may have been updated and improved since then. Just play around with some values until your webcam footage and Vysor footage appear to be aligned.
Setup Game Audio
Since Vysor does not send an audio signal and you want to stay wireless, the only reliable way I’ve discovered that works is to just turn up the Oculus Quest speakers and point a wireless mic at the spot near your ear where the audio comes out. It isn’t the best quality, but it gets the job done. Try using the one I recommended above. This is the same mic that will pick up your voice.
Arrange Everything In OBS
Like I said earlier, I’m not going to cover OBS settings in detail here because I did that already in this guide. Basically you just want to arrange your OBS window. For me, I cropped the scrcpy output so only my right eye is shown on the stream and made my webcam footage larger to fill up the screen (shown above).
Just make sure you have all of the audio sources arranged correctly so that the Quest audio and your microphone are both funneling through OBS. And if you are talking to anyone on Discord while playing or if they’re reading chat (like I usually do) then make sure chat audio is going into OBS as well.

Wired Quest / Quest 2 Streaming: What You Need
If you don’t have the funds to get extra equipment, maybe you just want to plug it in and stream games that way instead. For games that don’t require moving around much this is totally doable. Now, if you plug it in normally then it will just open up as a file location that you can drag and drop screenshots or movies to and from, but there’s a way around that.
All you really need to do this correctly are a long USB-C cord to connect the headset to your PC and a long audio auxiliary 3.5mm cable. This second aux cord is crucial if you want audio. I’d recommend at least 10 feet for each cord like the ones I linked, or longer, depending on the size of your room. For this method you’ll obviously be tethered to your PC as explained.
Then you need to go download scrcpy from GitHub. Scroll down and find the right .zip file for your OS and unpack it all into a folder somewhere on your PC. Alternatively, you can use the built-in ScrCpy function within SideQuest.
Finally, the only other crucial part of the puzzle for this method is you’ll need access to the same Oculus mobile app that you paired your Quest with during the setup process.
Other than that you need a webcam (so people can see what you’re doing IRL and not just your point of view in the headset) and Streamlabs OBS. For OBS setup and configuration refer to my previous VR livestreaming guide — I’m not going to rehash all of that here. The same setup process applies.
Wired Quest / Quest 2 Streaming: How To Do It
Here is what your stream could look like: [YouTube Archive]
Put Your Quest In Developer Mode
First and foremost, you need to put your Quest in Developer mode for this method to work. You can do this by making sure it’s powered on and paired to the mobile app, then go to Settings, click on the Quest, go to Advanced Setting, and toggle on Developer Mode. That’s it. You may need to register your Oculus account as a Developer account if you don’t see the option.
Plug It All In
Now you need to plug it all in to the computer. That means plug the USB-C cord into your Quest (in the same port you use to charge it) and plug the other end into your PC. Then plug the 3.5mm cord into the audio jack on your Quest and then plug the other end into your PC. I used the light blue Line-In mic port on the back of my tower, it’s usually next to the light green speaker port.
Launch Scrcpy
Just navigate to the folder you extracted everything into and launch the application. If your Quest is in developer mode and plugged in it should launch a window on your PC that shows two side-by-side vertical views, basically each lens. You’ve now got a direct feed from your Quest to your PC.
Alternatively, you can use the built-in ScrCpy function within SideQuest. However, regardless of your ScrCpy method there is no audio.
Open Your Audio Settings
In order to get audio working you need to mess around with some settings. Your 3.5mm cord should be plugged into the Line-In source, so just open up your Sound settings, go to Recording, right click on Line-In, go to properties, click the Listen tab, and check the “Listen to this device” box.
Now, the audio from the headset should be coming out of whatever your default Playback device is in your Sound settings.
Arrange Everything In OBS
Like I said earlier, I’m not going to cover OBS settings in detail here because I did that already in this guide. Basically you just want to arrange your OBS window. For me, I cropped the scrcpy output so only my right eye is shown on the stream and made my webcam footage larger to fill up the screen (shown above).
Just make sure you have all of the audio sources arranged correctly so that the Quest audio and your microphone are both funneling through OBS. And if you are talking to anyone on Discord while playing or if they’re reading chat (like I usually do) then make sure chat audio is going into OBS as well.
That’s about it! If you have any questions about how we’ve streamed Oculus Quest or any other VR content don’t hesitate to ask here in the comments, via email, or on Twitter.


